
Colorado looks compact on the map, but the distances, altitude, and mountain weather can surprise first-time visitors. This one-week itinerary is built to be realistic, balancing classic sights with manageable drive times and enough downtime to actually enjoy the views. It assumes you will have a rental car, are comfortable with light hiking, and are visiting between late May and early October, when most high-elevation roads and trails are typically accessible. Adjustments are noted for shoulder seasons and winter.
How This One-Week Colorado Plan Works
This itinerary focuses on three hubs that work well together in a single week: Denver and Boulder on the Front Range, Rocky Mountain National Park near Estes Park, and southern Colorado anchored by Colorado Springs and Great Sand Dunes National Park and Preserve. These areas offer dramatic scenery, good infrastructure, and a wide range of lodging at different price points.
The route is designed as a loop that starts and ends in Denver, which has the state’s largest airport and the broadest choice of rental cars. Daily drives are kept, where possible, under four hours, and you will spend at least two nights in each main base so you are not packing and unpacking every day. That slower pace also helps you acclimate to Colorado’s elevation, which can be physically demanding for visitors coming from sea level.
This plan is written for late spring through early fall, when mountain roads and trails are most reliably open. At higher elevations, snow can linger into June and return by October, and conditions can change quickly. Travelers visiting in winter can still follow the general structure, but will need to substitute lower-elevation walks and scenic drives for high alpine passes and some hikes.
Because Colorado’s most visited parks now often use timed-entry or reservation systems in peak season, this itinerary highlights where you are likely to need advance bookings, and where it is safer to remain flexible. It favors early morning starts, which help you find parking, avoid afternoon thunderstorms in the mountains, and make the most of daylight.
Day 1: Arrival in Denver and Easy Front Range Exploration
Plan to arrive in Denver as early in the day as your schedule allows. Denver International Airport sits at just over 5,400 feet, so many visitors will feel the elevation from day one. Pick up your rental car, drink more water than usual, and take your first day gently. Driving into the city from the airport takes around 30 to 45 minutes in normal traffic, longer at rush hour, so give yourself time.
Denver is a good place to recover from travel and adjust to the thinner air. Focus on low-effort, high-reward experiences: stroll through compact neighborhoods, visit a museum if the weather turns, or simply wander a downtown or central district that appeals to you. The central business district, LoDo, and nearby arts-focused areas offer a mix of dining, galleries, and casual walks without major hills.
If you prefer a small-city feel from the start, you can stay on Denver’s western side or in nearby Golden or Lakewood. These communities make it easier to exit toward the mountains on day two, while still offering restaurants and grocery stores to stock up on snacks and supplies. Wherever you sleep, keep your first evening light. Avoid strenuous exercise, limit alcohol, and try for an early night so you begin the mountain portion of your trip rested.
For those arriving late at night, do not feel pressure to fit in sightseeing. A simple airport hotel and a short drive into the city the next morning can be the most realistic and safest option, especially if you are jet-lagged or driving in unfamiliar winter conditions.
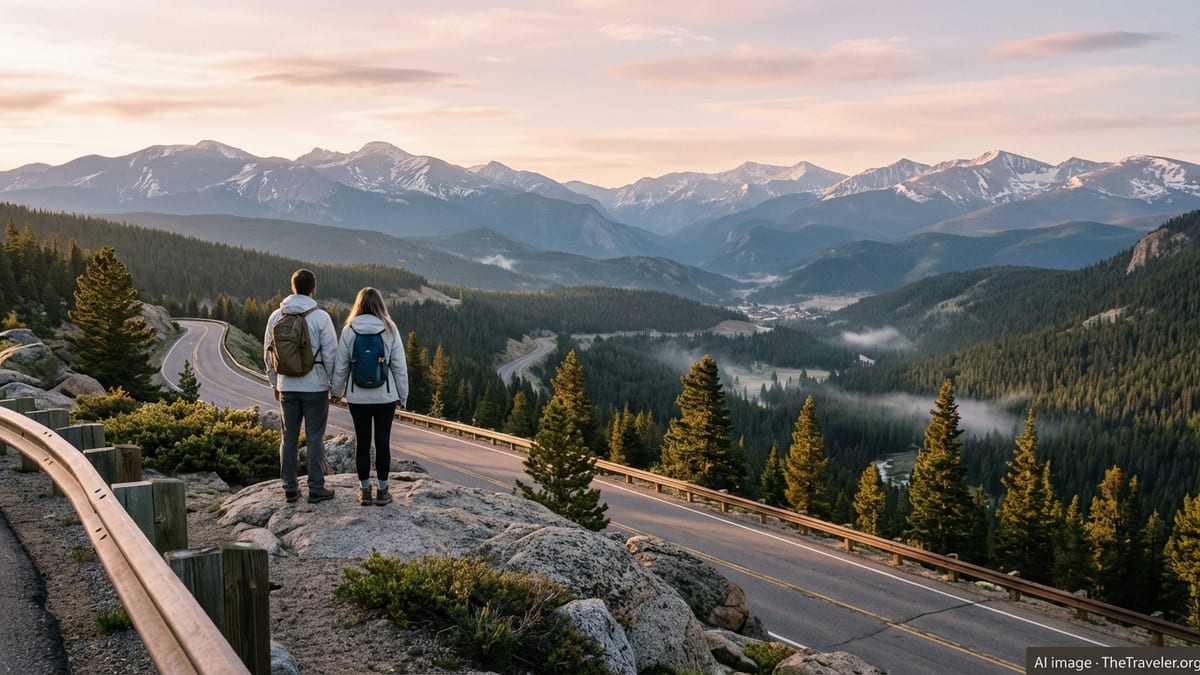
Day 2: Denver to Estes Park and Rocky Mountain National Park
On your second day, you will leave Denver for Estes Park, the eastern gateway town to Rocky Mountain National Park. The drive from central Denver to Estes Park usually takes around an hour and a half, depending on route and traffic. Set out after breakfast so you arrive by late morning, giving you nearly a full day to explore at comfortable altitude levels between 7,500 and 9,000 feet.
Rocky Mountain National Park is one of the busiest in the United States during peak season, and it has used timed-entry reservation systems in recent summers. These systems typically apply from late May into fall during daytime hours and can cover popular corridors such as Bear Lake Road. Check current park guidance several weeks before your trip and, if reservations are in place, secure your entry slots as soon as your dates open.
On arrival, stop first at a visitor center just outside or inside the park to pick up a map and talk with rangers about current trail conditions. High-elevation routes may still hold snow well into early summer, and wildlife activity varies by season and time of day. For your first afternoon in the park, opt for shorter, lower-elevation walks around lakes or valley trails rather than committing to a long ascent. This will help your body continue adjusting to the altitude without overexertion.
Estes Park itself works well as a two-night base. The town offers a wide choice of hotels, lodges, cabins, and vacation rentals, along with grocery stores and restaurants. Booking ahead is critical in July and August, when rooms frequently sell out on weekends. Once you have checked in, you can return to the park for a sunset walk or simply enjoy views from town as elk often graze in meadows and along the river corridor.
Day 3: Full Day in Rocky Mountain National Park
Dedicate your third day entirely to Rocky Mountain National Park. Start early, aiming to be through the entrance shortly after sunrise, especially if you are visiting in midsummer or on a weekend. Early starts help avoid congestion at popular trailheads and give you calmer conditions before afternoon clouds build. Mornings usually offer the best chance for stable weather and clear views.
Your options will depend on the season and which park zones are accessible. In summer, many visitors spend the morning on the Bear Lake Road corridor, using it as a base for classic lake hikes or moderate climbs to alpine viewpoints. In shoulder seasons, snow and ice may limit which trails are advisable without traction devices, and rangers can advise you on realistic choices for your fitness and gear.
If Trail Ridge Road, the park’s high, scenic highway, is open for the season, plan to drive all or part of it in the afternoon. Historically, this road opens in late May or early June and closes in autumn, but opening and closing dates change year to year with snow conditions. In winter and spring, upper sections close to through traffic and are not an option for a full crossing. Even in midsummer, sudden storms are possible, so carry warm layers and be prepared to turn back if conditions deteriorate.
Throughout your day, build in time to slow down and simply watch wildlife and changing light on the peaks. Scan valley meadows for elk and deer in early morning and evening, and keep a respectful distance from all animals. By late afternoon, you can descend back to Estes Park for dinner, a stroll along the riverwalk, or a quiet evening at your lodging. Avoid driving unfamiliar mountain roads when you are very tired or in heavy storms; it is usually safer to leave the park well before dark if conditions look unsettled.
Day 4: Estes Park to Colorado Springs via the Front Range
Day four shifts your base from northern to southern Colorado. Rather than attempting a long, remote mountain crossing, this itinerary uses Front Range highways to connect Estes Park with Colorado Springs in a realistic drive of around three and a half to four hours, depending on traffic. You will descend from Estes Park to the plains, pass near or through the Denver area again, then continue south.
Plan your departure from Estes Park after breakfast, leaving enough time to reach Colorado Springs in mid-afternoon. This timing avoids the very earliest rush-hour congestion near Denver while still giving you daylight at your next stop. As you drive, remember that weather can be dramatically different between the foothills and the plains. Summer thunderstorms can develop quickly in the afternoon, while winter trips can mean snow or ice, particularly near higher passes.
Once in Colorado Springs, check into your lodging and take an easy orientation walk. Many visitors begin with a visit or drive through red rock formations at city parks on the western edge, which provide impressive scenery with little physical effort. You can often access viewpoints by car or short, level paths, which is ideal if the previous day in Rocky Mountain National Park was strenuous.
Colorado Springs offers a wide range of dining options, from casual breweries and family restaurants to more formal spots. It is also a practical place to refuel the car, pick up groceries for the next day, and check the latest conditions for mountain roads and parks further south. If you are traveling in peak summer, booking lodging well in advance is important, as the city hosts a steady flow of visitors to nearby attractions and the surrounding mountains.
Day 5: Pikes Peak Region and Colorado Springs Highlights
Spend your fifth day exploring the Pikes Peak region around Colorado Springs. The area offers a blend of dramatic mountain scenery, historic small towns, and family-friendly attractions. What you choose will depend on your interests and the season, but it is realistic to focus on one or two major experiences rather than trying to fit in everything.
Many visitors prioritize reaching the summit of Pikes Peak, one of Colorado’s best-known fourteeners. Access options have evolved in recent years, and they may include a paved toll road, a cog railway, or a combination of reservation systems and timed entries, particularly on busy summer days. Check current access details before your trip and secure tickets or drive-up reservations if they are required for your travel dates. Weather at the summit can be significantly colder and windier than in town, even in midsummer, so dress in layers.
After your peak experience, you can return to lower elevations for an afternoon walk or a museum visit. Old mining towns in the region offer a sense of Colorado’s gold rush history, with cafes and shops in compact historic districts. For a quieter option, choose a local trail at moderate elevation outside the most crowded parks, or explore further into the foothills for views back toward the plains.
If you are traveling with children or prefer a lighter day, it can be enough to devote the morning to one marquee attraction and spend the rest of the time relaxing in town. The key is to resist the temptation to overpack your schedule. Altitude fatigue, strong sun, and mountain driving all take energy, and preserving some downtime will make the rest of your week more enjoyable.
Day 6: Colorado Springs to Great Sand Dunes National Park and Preserve
On day six, you will drive southwest from Colorado Springs toward the San Luis Valley and Great Sand Dunes National Park and Preserve. The journey typically takes around three hours, depending on your exact route and stops. Start in the morning so you can arrive at the dunes area by early afternoon and still have daylight for exploration or a late-day hike.
The approach to Great Sand Dunes is one of the most striking drives in Colorado. As you cross the broad San Luis Valley, the dunes rise in pale waves at the foot of the Sangre de Cristo Mountains. Summer visitors often arrive when Medano Creek is flowing at the base of the dunes, usually in late spring and early summer, creating a shallow, seasonal stream that feels like a temporary beach. Flow patterns vary year to year, so you will need to check approximate timing closer to your travel dates.
After stopping at the park’s visitor center for orientation, consider starting with something modest, especially if you are arriving in the heat of the day. Short walks from the main parking area lead directly onto the dune field. Climbing even a single high ridge can be surprisingly strenuous in deep, shifting sand, particularly at altitude and under strong sun. Early morning and evening are usually the most comfortable and photogenic times to hike, with lower temperatures and longer shadows across the sand.
Overnight options include the national park’s developed campground, which typically operates seasonally, basic lodging in the small community closest to the park, or hotels and rentals in the larger towns of Alamosa and Monte Vista. Camping reservations during peak months can fill quickly, especially on weekends. If you prefer firm plans, securing a site or room well ahead of time is wise. After sunset, the dunes area often offers very dark skies, and clear nights can reveal impressive stars and Milky Way views.
Day 7: Morning at the Dunes and Return to Denver
Your final full day begins with a last visit to the dunes before returning to Denver. If you are staying close to the park, aim for a pre-breakfast or early morning walk onto the sand. Temperatures are cooler, the light is softer, and crowds are thinner. This is an ideal time for a more ambitious climb onto the higher ridges if you skipped that on day six. Renting sandboards or sand sleds from nearby outfitters is popular, and staff can advise you on the best slopes for current conditions.
After a few hours on the dunes, between late morning and midday, begin your drive back toward Denver. The journey generally takes four to four and a half hours, depending on route, traffic, and weather. If you have an evening flight, make sure to allow extra time for possible construction delays or afternoon storms in summer, and for snow or ice in colder months. Many travelers prefer to spend this last night near Denver and fly out the following morning, which reduces stress and gives a buffer for any unexpected delays.
If your schedule is flexible, you might choose to break up the return drive with a lunch stop in a small mountain or valley town, or a short leg-stretching walk at a roadside trail or lake. This makes a long day on the road feel more manageable, particularly if you are traveling with children. Just keep a close eye on the clock if you have fixed departure times from Denver International Airport.
By evening, return your rental car and settle into either an airport hotel or a final night in the city. Use the time to reflect on which places resonated most. If you find yourself especially drawn to the high Rockies, southern desert landscapes, or historic towns, those preferences can help you shape a future, more focused trip to Colorado with either a mountain-hiking emphasis or a deep dive into one region.
Practical Tips for Making This Itinerary Work
This itinerary is intentionally moderate, but Colorado’s environment can still be demanding. The single best preparation is to respect altitude. Even fit travelers can experience symptoms such as headaches, fatigue, or shortness of breath, especially above 8,000 feet. Plan to drink more water than usual, moderate your alcohol intake, eat regular meals, and build in time to rest. If you develop persistent or severe symptoms, descend to a lower elevation and seek medical advice if needed.
Weather is another major factor. In summer, afternoon thunderstorms are common at higher elevations, particularly in and around Rocky Mountain National Park. Always aim to complete high, exposed hikes before midday and carry rain gear, warm layers, and sun protection, including a wide-brimmed hat and sunscreen. In winter and spring, snow and ice can make mountain driving hazardous. Even when major highways are plowed, secondary roads and passes can close on short notice. Checking road status with state transportation authorities and park services on the morning of travel is an essential habit.
Reservations now shape many Colorado trips. National parks may require timed-entry passes in peak season, mountain railways and scenic roads can use advance booking systems, and shuttle services, such as those to popular scenic areas, often sell out during autumn foliage or wildflower peaks. As a rule of thumb, secure the reservations that can block your plans if they are unavailable, such as park entries and summit trip tickets, several weeks in advance for summer and fall, and then keep your food and activity plans more flexible.
Finally, be realistic about driving. Distances in Colorado are often measured in time rather than miles, because mountain routes are slow and can be affected by weather or wildlife on the road. Avoid planning more than four or five hours of driving on any single day in this itinerary, and try not to schedule major hikes or activities immediately after a long drive. Sharing the driving workload, building in rest breaks, and avoiding late-night mountain driving are simple steps that can make your trip both safer and more enjoyable.
The Takeaway
One week in Colorado is enough to experience a genuine cross-section of the state, provided you resist the urge to see everything. By focusing on Denver and the Front Range, Rocky Mountain National Park, the Pikes Peak region, and Great Sand Dunes National Park and Preserve, this itinerary delivers mountain peaks, red rock formations, and desert-like dunes in a single coherent loop.
The key is pacing. Allow time for altitude adjustment in Denver, take two nights in each major base, and prioritize early starts for crowded parks and high-elevation drives. Do not hesitate to shorten a hike or skip a stop when weather, fatigue, or road conditions make your original plan feel unrealistic. Flexibility is a strength, not a weakness, especially in a landscape where conditions change quickly.
Used as a framework, this plan leaves room for personal interests, whether that means adding a brewery evening in Denver, a historic tour in a mining town, or an extra sunset at the dunes. With a few timely reservations and a willingness to adapt, this one-week Colorado itinerary can work smoothly in the real world, offering memorable scenery without exhausting schedules.
FAQ
Q1. When is the best time of year to follow this one-week Colorado itinerary?
The most practical window is usually late May through early October, when high-elevation roads and many hiking trails are more likely to be open and snow-free. Shoulder seasons can still bring winter-like conditions, so you should always check current forecasts and park updates close to your travel dates.
Q2. Do I really need a rental car for this trip?
For this specific loop, a rental car is strongly recommended. While there are shuttles and limited public transport to some attractions, the flexibility of your own vehicle makes it realistic to connect Denver, Rocky Mountain National Park, Colorado Springs, and Great Sand Dunes within a single week.
Q3. How far in advance should I book timed-entry reservations and key activities?
In peak summer and fall foliage season, you should plan on booking national park timed-entry passes, summit rail tickets, and popular shuttles as soon as each provider opens reservations for your travel dates. This can range from weeks to several months in advance, especially for weekends and holiday periods.
Q4. Is this itinerary suitable for families with children?
Yes, with modest adjustments. The daily drives are relatively manageable, and most destinations offer short, child-friendly walks and viewpoints. Families may want to schedule more frequent playground or park stops, choose lodging with kitchenettes, and build in extra downtime after long hikes or scenic drives.
Q5. How worried should I be about altitude sickness?
Most visitors experience at least mild symptoms when sleeping above 5,000 feet or hiking above 8,000 feet, but serious illness is less common. The best approach is preventative: ascend gradually, stay hydrated, avoid excessive alcohol, and scale back plans if you feel unwell. If symptoms worsen or do not improve with rest and descent, seek medical advice promptly.
Q6. Can I follow this plan in winter?
You can follow the broad structure in winter, but you will need to adjust expectations. High mountain roads often close to through traffic, many hiking trails become snow-covered, and driving conditions can be challenging. You would likely focus more on city sights, lower-elevation walks, and winter sports in designated areas rather than on alpine drives and long backcountry hikes.
Q7. How much hiking experience do I need for this itinerary?
This plan assumes you are comfortable with easy to moderate day hikes of a few miles, with some elevation gain. You do not need technical mountaineering skills. If you are new to hiking, you can choose shorter, well-marked trails near lakes and viewpoints and skip longer ascents to high passes or peaks.
Q8. Is it possible to add Aspen or other mountain towns to this week?
It is possible but will make the schedule tighter. Adding a major detour to a resort town usually requires either an extra night or replacing one of the existing stops. Trying to squeeze in too many mountain towns in seven days often leads to long drives and less time actually enjoying each place.
Q9. What kind of clothing and gear should I pack?
Pack layers that you can easily add or remove, including a light insulated jacket, a waterproof shell, sun hat, and gloves or a warm hat for high elevations, even in summer. Comfortable walking shoes or light hiking boots with good traction are essential. A small daypack, reusable water bottle, and sun protection are useful every day.
Q10. How much driving will I do on this itinerary overall?
Over the week, you can expect to drive several hundred miles, with most point-to-point days involving two to four hours on the road. The loop is designed to avoid very long single-day drives, but mountain routes are slower than flat highways. Planning rest breaks, sharing driving duties if possible, and avoiding tight connections with flights will help keep the trip realistic and low-stress.