


Landing at Tokyo Narita Airport after a long international flight can feel overwhelming, especially if it is your first time in Japan. The good news is that the arrival process is orderly and well signposted, and with a little preparation you can move from the aircraft door to the arrivals lobby smoothly. This guide walks through immigration, baggage claim and customs at Narita, with practical examples and up to date details so you know exactly what to expect.
Get the latest updates straight to your inbox!
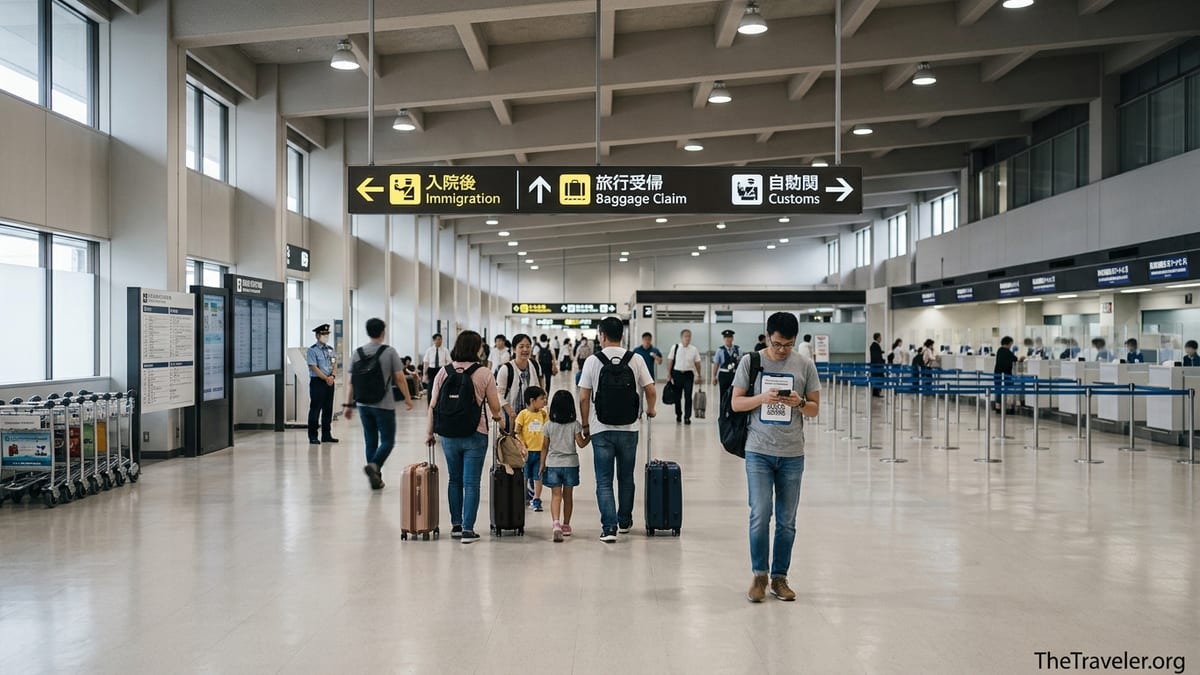
Understanding Narita’s Terminals and Your First Steps Off the Plane
Narita International Airport serves most long haul flights into Tokyo and is divided into three passenger terminals. Terminal 1 mainly handles Star Alliance and SkyTeam airlines such as ANA, United Airlines and Korean Air, while Terminal 2 is used heavily by Oneworld carriers including Japan Airlines, American Airlines and British Airways. Terminal 3 is a more compact facility used primarily by low cost carriers like Jetstar Japan and Peach Aviation. Knowing which terminal you arrive at matters because immigration halls, baggage carousels and onward transport options are arranged by terminal rather than a single central building.
After your aircraft parks and the doors open, you will follow overhead signs marked "Arrival" in English and Japanese. At Narita these signs quickly divide passengers between "Domestic" and "International" transfers and those entering Japan. As an arriving international passenger, you follow the stream marked "Immigration". Cabin crew often hand out Japanese immigration and customs information during descent and may remind passengers to have their passports and any necessary forms ready before reaching the immigration hall.
If you are connecting to a domestic Japanese flight on the same ticket, such as flying from Los Angeles to Narita then onward to Sapporo with ANA, you will still complete immigration and customs at Narita before collecting your bag and re-checking it for the domestic segment if it has not been through-checked. Airline staff at the gate or transfer counters will direct you to either the international transfer route or landside arrivals depending on your ticket. For most leisure travelers whose final destination is Tokyo, you simply follow the "Arrivals" signage to the main immigration area in your terminal.
On the walk from the gate to immigration you will pass restrooms, water fountains and sometimes vending machines. Free Wi-Fi is available in the corridors and halls, but it can be congested around peak arrival times in the afternoon and evening, so if you are relying on an online form like Visit Japan Web, it is wise to have screenshots of your QR codes stored on your phone before landing.
Immigration: What Documents You Need and How the Process Works
At immigration, foreign visitors line up at counters marked "Foreign Passports" while Japanese citizens and residents use separate lanes. The key document you need is your passport with at least one empty page for the landing permission sticker. Most short stay tourists from the United States, Canada, the European Union, the United Kingdom, Australia and several other countries do not need to obtain a visa in advance for stays of up to 90 days, but you must still complete the regular entry interview, fingerprinting and photo capture at the counter. Travelers who do require a visa, such as certain long stay students or workers, present their visa along with the passport.
Japan previously required a paper disembarkation card to be filled out in blue or black ink. As of 2026, many travelers instead register their information online through the Visit Japan Web system and show a single QR code that covers both immigration details and customs declaration. If you have used Visit Japan Web, you simply open the saved QR code on your phone or a printed copy and present it along with your passport when you reach the front of the line. The officer will scan the code, verify your details, ask brief questions about your stay, then take your fingerprints and photo. This does not skip immigration entirely but can make the process smoother and reduce errors compared with handwriting forms after a long flight.
If you have not used Visit Japan Web, you can still enter Japan without difficulty. In that case, look for stands in the immigration hall that hold blank disembarkation cards. You complete your basic details such as full name, flight number, intended address in Japan (for example, "Shinjuku Washington Hotel, Tokyo"), length of stay and purpose of visit. Pens are sometimes in short supply during busy periods, so carrying your own ballpoint pen can save time. You then queue in the same immigration lanes as everyone else. The officer will review your form, ask similar questions and record your biometric data.
Wait times vary by time of day and day of week. For example, during a cluster of North American arrivals around late afternoon, lines at Narita Terminal 1 can stretch to 30 to 45 minutes, while late evening flights from Southeast Asia sometimes clear in under 15 minutes. Families with small children and travelers with reduced mobility may be directed to a priority lane; if you need assistance, approach a staff member in a navy or black airport uniform and politely ask for help. Once cleared, you receive a landing permission sticker in your passport rather than a physical entry card, and you proceed down the escalators or corridor towards baggage claim.
Visit Japan Web and Electronic Gates: How Much Time It Really Saves
Visit Japan Web is the Japanese government’s unified online pre-arrival system that combines the information previously written on immigration and customs forms into a single digital profile. In practice, you create an account before travel, register your passport and trip details, then complete the immigration and customs sections online. Shortly before your trip, the system generates a QR code. At Narita, you can show this QR at immigration and again at electronic customs gates instead of handing in paper slips. Many airlines now include reminders to complete Visit Japan Web in their pre-departure emails for Japan-bound passengers.
In theory, Visit Japan Web reduces the time you spend writing out forms at the airport, and in some terminals QR users can access dedicated kiosks or e-gates. For example, at Narita Terminal 3 there are joint kiosks where you scan your QR code and passport, confirm your details and then join a shorter line for the immigration officer. In reality, how much time you save depends on the moment you arrive. Some travelers report clearing immigration and customs in under 20 minutes door to door when using Visit Japan Web during moderate traffic periods, while others find that in very quiet windows the paper lanes move just as quickly because no one is queuing.
What is consistent is that having a pre-generated QR code helps reduce small but annoying issues. You are less likely to make mistakes on your address or flight number because you enter them calmly at home instead of scribbling on a form after a ten hour flight. If you are traveling with family or a partner, you can also register everyone under one Visit Japan Web account and present a set of codes in sequence. Parents arriving from San Francisco to Narita with two children, for example, often appreciate not having to juggle three or four paper forms at the same time as passports and tired kids.
Because airport Wi-Fi can be patchy, a practical tip is to take a screenshot of your QR code and save it in your phone’s photo gallery or wallet app. That way, even if your roaming data has not yet activated or the free Wi-Fi login page will not load, you can still display the necessary code instantly. If something goes wrong or you forget to register entirely, staff in the arrivals hall will simply direct you to fill out the paper forms instead, and you will proceed through the standard process.
Baggage Claim: Finding Your Carousel and Handling Issues
After immigration you move directly into the baggage claim area, which is located on the same level in each terminal. Overhead monitors list flight numbers, origin cities and assigned carousels in English and Japanese. For example, if you have arrived on ANA flight NH801 from Singapore into Terminal 1, the monitor may show "NH801 Singapore Carousel 6." You follow the arrows to your carousel and wait behind the safety line. Trolleys are free to use at Narita and can be found stacked near the entrances to the hall and close to each carousel.
Baggage delivery times vary, but many long haul flights start delivering the first bags within 15 to 25 minutes of reaching the gate. Priority tagged luggage for business class or airline elite travelers typically appears among the first pieces. During very busy waves of arrivals around mid-afternoon, it is not unusual to wait 30 minutes or slightly longer. While you wait, this is a good time to check messages, pick up any free tourism brochures, or use the restrooms located against the walls of the hall. Do not leave the secure baggage area until you are sure about the status of all your checked bags.
If your baggage does not appear on the carousel once it stops, look for the lost baggage or baggage service counter for your airline or its ground handling partner. These counters are usually positioned at the end of the carousel row and have the airline’s logo above. You will need your baggage tag, which is the small sticker the check-in agent placed on your boarding pass or passport at departure. Staff will trace your bag using the international tracking system and may arrange delivery to your hotel in Tokyo or another address in Japan if it has been delayed. For example, a traveler arriving from New York with a missed baggage connection in Hong Kong can usually expect their suitcase to be delivered to their Shibuya hotel within one to two days at no extra cost.
Occasionally, customs officers remove selected bags from the belt for additional screening, especially if a scan shows unusual shapes or dense electronics. These are placed near the carousel with a note. If you spot your suitcase set aside, simply approach the nearby officer when you are ready to proceed to customs. This is not necessarily a sign of wrongdoing; it may just mean your bag contained something that looked unusual on the x-ray, such as several cameras packed closely together.
Customs: What You Must Declare and How Inspections Work
Once you have collected all your luggage, you follow the signs towards customs. At Narita, you will see lanes divided into two colors: the green channel for people who have nothing to declare and the red channel for those bringing items over the duty free allowance or restricted goods. If you completed the customs section of Visit Japan Web, you can use electronic customs gates in terminals where they are installed. At these gates you scan your QR code and passport, then walk through as the system records your declaration. Uniformed customs officers stand nearby to assist and may still ask brief questions.
Japan’s duty free allowance for most visitors generally covers typical tourist purchases. As of 2026, if you are over 20 years old, you can usually bring in a modest quantity of alcohol and cigarettes for personal use, along with personal belongings and gifts up to a certain value without paying tax. For example, a traveler carrying a new smartphone and a camera they intend to keep, plus gifts such as boxed chocolates worth the equivalent of a few hundred US dollars in total, will almost always be within the allowance. However, higher value items such as luxury watches still in their boxes or large quantities of electronics for resale should be declared in the red channel.
In addition to value-based limits, Japan has strict rules on certain categories of goods. Fresh fruit, meat products and some plants are controlled for quarantine reasons, while narcotics, certain knives, firearms and counterfeit goods are prohibited or tightly regulated. If you arrive from abroad with a salami or fresh mangoes as gifts, for instance, you should expect them to be confiscated, and you may be referred to the plant and animal quarantine desk before reaching customs. Prescription medicines for personal use are usually allowed if you carry them in their original packaging with a doctor’s note, but some substances that are over-the-counter elsewhere are restricted, so checking Japanese embassy guidance before travel is sensible.
For most ordinary tourists, the customs interaction is brief. You hand your paper declaration or show your QR code, place your luggage on the conveyor for x-ray screening and answer simple questions such as "Where are you staying in Japan?" or "How long will you stay?" Officers may ask you to open a bag for inspection, especially if the x-ray operator has flagged something. For example, a photographer carrying several camera bodies and lenses might be politely asked to open the case so the officer can confirm they are personal belongings and not new commercial stock. As long as you answer honestly and remain cooperative, these checks are usually finished within a few minutes.
Reaching the Arrivals Lobby and Getting Ready for Tokyo
After clearing customs, automated doors slide open and you step into the public arrivals lobby of your terminal. In Terminal 1 and Terminal 2, this area is on the first floor and is typically busy with people waiting with signs, tour operators and families greeting returning passengers. Overhead signs guide you immediately to transportation options such as trains, airport limousine buses and taxis, as well as to services like currency exchange counters, convenience stores and mobile phone and SIM rental booths.
If you plan to travel into central Tokyo by rail, follow signs for "Railway" or "Train." In Terminal 1, escalators and elevators take you down to the basement level where JR Narita Express and Keisei trains depart. The Narita Express runs directly to major stations like Tokyo, Shinagawa, Shibuya and Shinjuku, with reserved seats and luggage racks, and is popular with travelers carrying large suitcases. Keisei’s Skyliner offers a fast connection to Nippori and Ueno, convenient if you are staying on the northern side of the city or plan to transfer to the Yamanote Line. Tickets for these trains can be purchased at staffed counters or from multilingual ticket machines located just outside the platforms.
For travelers with hotel reservations that include airport bus transfers, staff at the arrivals lobby information desks can point you to the correct bus stop outside each terminal. For example, many major hotels around Tokyo Station and Shinjuku are served by airport limousine buses that pick up from numbered bus stops directly outside the arrivals floor. If you arrive late at night when train services are winding down, these buses or a fixed-fare taxi can be more convenient, although they may take longer in traffic.
Before leaving Narita, many visitors also take care of practical tasks that make their stay in Japan easier. Currency exchange counters allow you to convert US dollars or euros into yen, although ATMs in convenience stores like 7-Eleven in the arrivals area usually offer competitive withdrawal rates if your bank supports international withdrawals. Telecom providers and rental companies have counters where you can purchase a physical SIM card or rent a pocket Wi-Fi unit. For example, a typical short-term data SIM with around 10 to 20 GB of data for two weeks might cost the equivalent of 30 to 50 US dollars, providing enough connectivity for maps, messaging and casual browsing.
Realistic Timelines and Tips for a Smooth Arrival
For planning purposes, it is useful to estimate how long the entire arrival process at Narita will take. On a fairly typical afternoon flight from Los Angeles to Narita Terminal 2, it is realistic to expect around 10 to 15 minutes of walking from the gate to immigration, 20 to 40 minutes in the immigration queue depending on how many flights land at the same time, 10 to 25 minutes for bags to appear on the carousel, and then another 5 to 10 minutes to pass customs and reach the arrivals lobby. In total, many travelers find that 60 to 90 minutes from aircraft door to the public arrivals hall is normal.
Travelers arriving at quieter times, such as early morning or late evening, may clear much faster. A couple arriving from Sydney on a late evening flight might complete immigration in under 15 minutes and find their bags already waiting, reaching the arrivals lobby in about 40 minutes. Conversely, during exceptionally busy holiday periods in Japan such as Golden Week in late April and early May, or around New Year, immigration queues and baggage handling can be slower, so allowing up to two hours before booking onward train tickets is wise.
To keep the process smooth, prepare a few things before landing. Fill out Visit Japan Web if possible and save screenshots of your QR code. Keep your passport, hotel address and flight details in an easily accessible pocket rather than buried in a suitcase. If you are carrying items that may need to be declared, such as large amounts of cash or expensive new electronics in their boxes, keep purchase receipts handy. Finally, remember that Japan’s border and customs staff are generally polite but formal; a calm, respectful attitude and clear answers in simple English usually go a long way, even if there is a minor issue with your luggage or paperwork.
Families and older travelers can make the experience easier by planning rest stops. The corridors between gates and immigration have restrooms and sometimes seating areas, and the baggage hall has benches where you can sit while waiting for luggage. If you are traveling with small children, consider packing a light snack and a favorite toy in your carry-on so they have something familiar during the waiting periods.
The Takeaway
Arriving at Tokyo Narita Airport is a structured process built around three main steps: immigration, baggage claim and customs. While the scale of the airport and the volume of international flights can make the halls feel busy, systems are well organized, signage is clear in English, and staff are on hand to guide confused or tired travelers. With realistic expectations about timing and a basic understanding of how the queues and forms work, the experience is more likely to feel like an efficient introduction to Japan rather than a stressful obstacle.
Using tools like Visit Japan Web, preparing your passport and accommodation details in advance, and knowing what you can and cannot bring through customs all help shorten your time in line and reduce surprises. Whether you are heading straight to a Narita Express train bound for Shinjuku, catching a limousine bus to a Tokyo Bay hotel, or connecting onto a domestic flight, completing these arrival procedures smoothly sets the tone for the rest of your trip. A little preparation before your plane touches down at Narita goes a long way toward ensuring that your first hours in Japan are focused on anticipation and discovery instead of bureaucracy.
FAQ
Q1. Do I need to use Visit Japan Web to enter Japan at Narita?
Visit Japan Web is recommended but not mandatory. It replaces paper immigration and customs forms with a QR code, but if you do not register in advance you can still fill out paper forms on arrival and use the regular lanes.
Q2. How long does it usually take to clear immigration at Narita?
Timing varies by time of day and number of arriving flights. Many travelers clear immigration in 20 to 40 minutes, but during busy peaks or holidays it can take closer to an hour. Arrivals in quieter windows, such as late evening, may finish much faster.
Q3. What information do I need for the disembarkation card or Visit Japan Web?
You should have your passport details, flight number, intended address in Japan, length of stay and purpose of visit. If you use Visit Japan Web, you enter these in advance; if not, you write them on the paper disembarkation card distributed on the plane or available in the arrivals hall.
Q4. Can my family go through immigration and customs together?
Yes. Families usually line up together at immigration so that one officer can process everyone in sequence. For customs, one adult can complete a joint declaration for the family, and you walk through either the green or red channel together with all your luggage.
Q5. What should I do if my checked bag does not appear at baggage claim?
Wait until the carousel stops and a notice appears on the monitor, then go to your airline’s baggage service counter in the baggage hall. Show your passport and baggage tag so staff can trace your suitcase and arrange delivery to your accommodation in Japan if it has been delayed.
Q6. What items do I need to declare at Japanese customs?
You must declare items that exceed duty free allowances or fall into restricted categories, such as high value new goods intended for resale, large amounts of alcohol or tobacco beyond personal limits, and certain foods or animal products. If unsure, choose the red channel and ask the customs officer for guidance.
Q7. Are there electronic customs gates at Narita?
Yes. At Narita, electronic customs gates are available in terminals where Visit Japan Web is supported. If you have completed the online customs declaration and have a QR code, you can scan it and your passport at these gates instead of handing over a paper form, although officers may still inspect luggage when necessary.
Q8. Can I buy a SIM card or pocket Wi-Fi at the arrivals area?
Yes. After customs in each terminal, you will find telecom counters and kiosks selling short-term SIM cards and renting pocket Wi-Fi units. Typical visitor SIM packages offer several gigabytes of data for one to three weeks and are priced at roughly the equivalent of a few dozen US dollars.
Q9. How do I get from Narita to central Tokyo after arrivals?
From the arrivals lobby, follow signs to the basement train stations for the Narita Express or Keisei Skyliner if you prefer rail. Alternatively, airport limousine buses run to many major hotel districts, and taxis and fixed-fare airport cabs are available outside the terminal, though they tend to be more expensive.
Q10. Is Narita easy to navigate if I do not speak Japanese?
Yes. Signage throughout immigration, baggage claim and customs is bilingual in Japanese and English, and many staff at information counters and transport ticket offices speak basic English. If you are unsure where to go, showing your boarding pass or hotel address to an airport employee usually gets you clear directions.