


Landing in Manila for the first time can feel intense. The air is humid, the arrivals hall is crowded, and everyone seems to be in a hurry. Yet the most important things you need before stepping into the city are simple: a working mobile connection and enough Philippine pesos for transport and first expenses. This guide walks you, step by step, through how to sort SIM cards, eSIMs, ATMs, money changers, and taxi payments at Ninoy Aquino International Airport (NAIA), so you can leave the terminal calm and prepared.
Get the latest updates straight to your inbox!
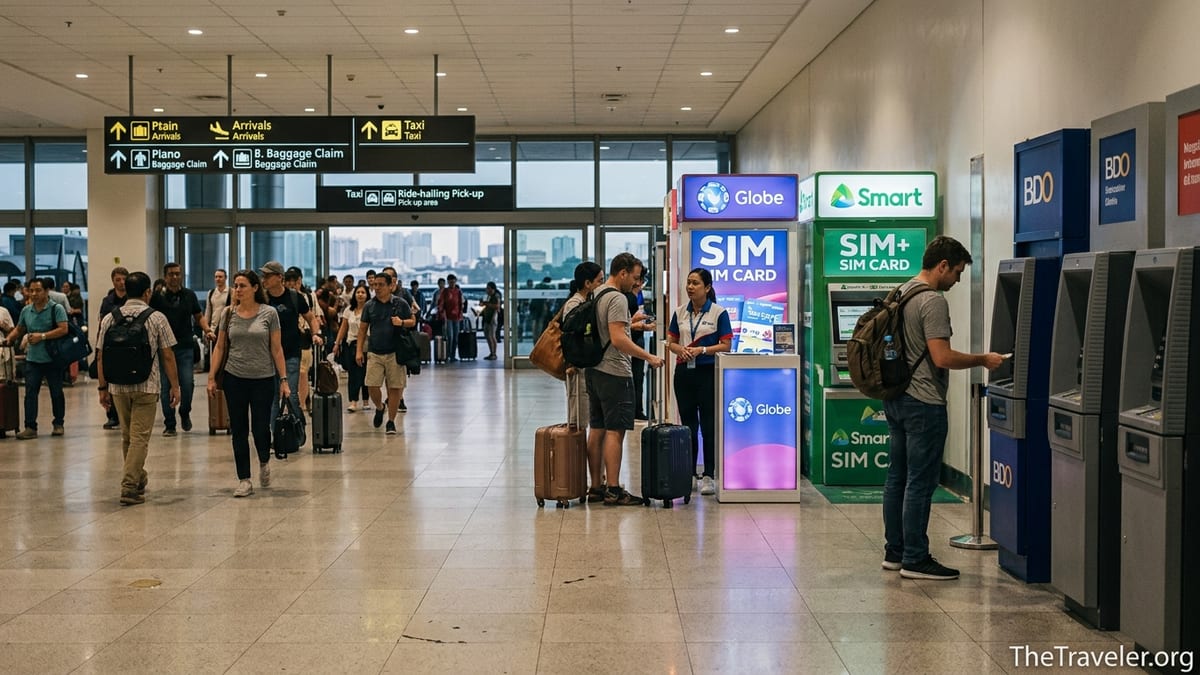
First Steps After Landing at NAIA
After disembarking, you will pass through immigration, baggage claim, and customs. Only after exiting customs do you reach the public arrivals area where the main options for SIM cards, ATMs, and money exchange are located. In Terminals 1 and 3, this is a wide hall directly beyond the customs doors, with meeting points, coffee shops, and service counters along the sides. If you need cash or data urgently, avoid walking straight outside to the curb; most of what you need is still inside the building.
Free airport Wi-Fi is available, usually provided by local telcos such as Globe. You typically log in with your name and mobile number. If you do not yet have a Philippine SIM, you can still connect using your foreign number, which is helpful for booking a ride-hailing car such as Grab while you decide on a SIM or eSIM. However, the free Wi-Fi is time-limited and can be patchy during peak hours, so it is not a long-term solution.
If you are arriving late at night or very early in the morning, note that most essential services within the arrivals hall at Terminal 3, including at least one telco booth and several ATMs, usually remain available. Money changers, however, may operate on more limited hours, so you should not count on finding every counter open at 03:00. Always have a backup plan for cash, such as an ATM or a small amount of emergency dollars or euros.
Before you leave the secure arrivals area, decide your priorities: do you want to buy a physical SIM, rely on an eSIM, or stick with roaming for the first night? Do you prefer to use an ATM or exchange cash? Clear answers to these questions will stop you from being upsold at the first kiosk you see.
SIM and eSIM Options Inside the Airport
The Philippine mobile market is dominated by three players: Globe, Smart, and Dito. All three have some presence in Manila and around the country, but Globe and Smart remain the most established choices for travelers. In 2026, both operate dedicated kiosks in the NAIA arrivals areas, particularly in Terminal 3, where inbound international flights on airlines such as Emirates and Delta commonly arrive. Their booths are usually located along the main arrivals corridor immediately after customs, with bright branding and staff in uniforms calling out to new arrivals.
At these airport kiosks, you generally buy a bundled tourist package, not just a bare SIM. A typical offer might be around 500 to 1,000 Philippine pesos for 15 to 30 days of validity with a sizable data allowance, for example roughly 20 to 40 GB, plus some local calls and texts. Prices change frequently, and airport packages are usually more expensive than the same telco’s promos in the city, but in exchange you get instant activation, staff assistance, and English-language support. Many kiosks can accept major credit and debit cards, which is convenient if you have not yet withdrawn cash.
Globe, for example, promotes a Traveler SIM product and maintains a store inside the Terminal 3 arrivals section that can activate both physical SIMs and eSIMs, load data packages, and handle basic support issues. Smart offers comparable prepaid tourist bundles through its counters, often focusing on generous data allocations that appeal to heavy social media and video users. Dito is more visible in the city and at some terminals, but its airport footprint can be patchier, and its coverage outside major urban areas is still catching up.
If your phone supports eSIM, you have two main paths. You can pre-purchase an international eSIM from providers like Airalo or Holafly before flying, which activates the moment you land and connect to a Philippine network. Or you can ask the Globe or Smart staff at NAIA to convert their local tourist product into an eSIM instead of a physical SIM. The advantage of a local eSIM is access to full-speed domestic networks at local rates. The downside is that airport staff may be less familiar with troubleshooting complex eSIM issues compared with simply inserting a plastic SIM.
Buying SIMs in the City vs at the Airport
If you are price-sensitive, know that airport SIM packages are usually the most expensive way to get connected in the Philippines. Similar data bundles sold in malls, convenience stores, or official telco shops in Manila neighborhoods such as Makati or Bonifacio Global City can cost noticeably less. For example, a 30-day, 20 GB package that might be sold around 800 pesos in Terminal 3 could be closer to 400 or 500 pesos at a Globe or Smart store in a city mall. The premium you pay at the airport covers the convenience and service.
Travelers who already use eSIM-based roaming or can survive on hotel Wi-Fi for the first evening sometimes skip the airport offers and buy a SIM later. From NAIA Terminal 3, you can walk via the Runway Manila pedestrian bridge to a nearby mixed-use complex with several convenience stores and small electronics shops that sell cheaper prepaid SIMs and top-ups. This can be a good compromise: you get out of the airport bubble quickly but still pick up a SIM before heading deep into the city.
However, for many first-time visitors, the safest choice is to sort connectivity before leaving the terminal, even at a higher price. Having a working local data connection means ride-hailing apps function smoothly, you can share your live location with your accommodation, and you can quickly check routes and neighborhoods if your taxi driver suggests a detour. If you are arriving late at night, traveling alone, or carrying expensive gear, the convenience and added sense of security often outweigh the savings you might get in a mall the next day.
One middle-ground approach is to purchase the smallest practical package at the airport, such as a seven-day or low-data bundle, then switch to a cheaper long-stay promo later using the telco’s app or via electronic top-up in the city. This limits your upfront cost at NAIA while ensuring you are covered for the critical first 24 hours.
Using ATMs at NAIA for Cash
There are several ATMs in the arrivals areas of NAIA, especially at Terminal 3, where machines from major Philippine banks such as BDO, BPI, Metrobank, and Philippine National Bank are commonly found. Many travelers report seeing at least four machines clustered along the arrivals corridor, with more near bank branches or service counters. These ATMs usually operate 24 hours a day, although occasional outages or restocking periods are possible.
When withdrawing cash, expect a local ATM fee per transaction, typically the equivalent of a few US dollars. Your home bank may add its own foreign withdrawal charge on top, so it is usually cheaper to make a few larger withdrawals rather than many small ones. At the time of writing, 10,000 pesos is a common per-transaction limit at many local ATMs, although some banks allow more. Check your own bank’s daily foreign withdrawal limit before you travel.
To minimize card issues, use ATMs from well-known banks. BDO and BPI are among the country’s largest institutions, with extensive ATM networks and support for international cards via networks such as Visa, Mastercard, and Plus or Cirrus. Metrobank and PNB machines similarly work for most foreign debit cards. Avoid small, unfamiliar brands or standalone currency-conversion kiosks that function like ATMs but advertise “dynamic currency conversion” with flashy screens. These often mark up the exchange rate heavily. Always choose to be charged in Philippine pesos rather than your home currency when the machine gives you a choice.
Because ATM lines can form when several long-haul flights land at once, it is worth taking cash out before you stop at the SIM kiosks if you plan to pay for your SIM or taxi in pesos. A common strategy is to withdraw enough for your first 24 to 48 hours: for example, 5,000 to 8,000 pesos might comfortably cover airport taxis, a couple of meals, a local SIM, and incidentals for a solo traveler.
Money Changers and Exchanging Foreign Cash
NAIA hosts several licensed money changers and bank-operated foreign exchange counters in both the pre-immigration and arrivals areas. In Terminal 3, you will typically find counters between immigration and baggage claim as well as after customs near the exits. These booths are convenient if you are carrying euros, US dollars, Japanese yen, or other major currencies and prefer not to use an ATM immediately.
Airport exchange rates are rarely the best in the country. Spread margins at NAIA can be significantly wider than at reputable money changers in central Manila districts like Makati or Ortigas, where competition pushes rates closer to interbank levels. Still, the airport counters are safe and regulated by the Philippine central bank, which is important if you are in no position to shop around after a long flight. A practical approach is to change only what you need for immediate expenses, such as 50 to 100 US dollars worth, then look for better rates in the city.
Not every counter is open 24 hours, and some may temporarily run out of certain currencies during busy periods. If you are arriving late, check the hours posted at each booth. It is wise to carry a small amount of US dollars or euros in small denominations as a backup. In emergencies, many Manila hotels and larger malls can also exchange major currencies, often at rates similar to or better than the airport.
When exchanging money, count your pesos carefully at the counter before walking away. Staff are generally honest, but the arrivals hall can be crowded and distracting, and miscounts do happen. Keep your exchange receipt until you reach your accommodation, as it may be helpful if you later discover a discrepancy or need to prove the origin of your cash to your home bank.
Paying for Taxis and Transport From the Airport
Once you exit the sliding doors into the arrivals pick-up area, you will be approached almost immediately by people offering rides. It is strongly recommended to ignore unsolicited offers and follow the signs to the official taxi and ride-hailing zones. NAIA has a centralized hub at Terminal 3 that handles both app-based services like Grab and licensed metered taxis operated by companies such as JoyRide. Look for clearly labeled counters or lanes supervised by airport staff.
There are several types of taxis to consider. Airport coupon taxis charge fixed rates based on published zones. For example, a ride from Terminal 3 to central Makati might cost somewhere around 400 to 700 pesos, depending on the latest tariff and traffic conditions. You pay at the coupon counter inside or just outside the arrivals hall and receive a printed coupon to hand to your assigned driver. This is often the easiest method for first-time visitors, since there is no haggling and limited room for scams.
Metered yellow airport taxis and white city taxis are also available, but experiences vary widely. Some travelers report fair, meter-based fares similar to coupon taxis, while others encounter drivers who refuse to use the meter or who press hidden buttons that inflate the fare. Stories of being quoted 2,000 to 3,000 pesos for relatively short trips still appear regularly online. If you choose a metered taxi, insist politely that the meter be turned on from the start, and be prepared to walk away if the driver refuses.
Ride-hailing apps like Grab and JoyRide are increasingly popular and, for many, the safest option. You can book a ride using the airport Wi-Fi or a freshly activated local SIM. The app shows you an estimated fare upfront, which might be around 250 to 500 pesos for common routes such as Terminal 3 to Pasay or Makati at off-peak times, rising during heavy traffic or late-night surcharges. Payment can be made in cash or via card saved in the app. Having small bills, such as 100 and 200 peso notes, is helpful because some drivers struggle to provide change for large denominations.
Cards, Cash, and Practical Payment Tips
In Manila, cards and contactless payments are widely accepted in mid-range hotels, big restaurants, shopping malls, and ride-hailing apps. However, cash still dominates for everyday transactions, especially in street food stalls, neighborhood eateries, jeepneys, tricycles, and small family-run guesthouses. As a new arrival, you should treat cash as your primary payment method for at least the first day, with cards as a convenient backup in more formal establishments.
At NAIA itself, many SIM card kiosks, coffee shops, and official taxi counters can process foreign credit and debit cards. Nonetheless, card terminals occasionally go offline, or staff may prefer cash for smaller transactions. For example, a taxi coupon counter might technically accept cards but ask you to pay in pesos to speed up the line. Having at least 1,000 to 2,000 pesos in small notes right after landing will make these situations much smoother.
Keep your cards and cash separated in different pockets or bags. Crowding around arrivals and taxi queues means that pickpocketing, while not rampant, is always a possibility. Consider storing one backup card and some emergency cash in a hidden pouch or your carry-on, separate from your primary wallet. If you are traveling with a companion, split your cash between you so that a lost wallet does not leave you completely stranded.
When paying with cards in the Philippines, it is common for merchants to ask whether you want to be charged in your home currency or in pesos. Always choose pesos. Dynamic currency conversion usually uses a poor exchange rate and adds hidden margins. The same rule applies at ATMs: decline conversion and insist on being billed in pesos to let your home bank handle the rate.
What to Do Before Leaving the Terminal
Before you walk out into Manila’s humidity and traffic, take a few quiet minutes inside the terminal to get organized. Find a corner of the arrivals hall, sit down, and check that your SIM or eSIM is working properly: can you load a web page, open a map, or receive an SMS? If activation has not completed, go back to the kiosk while staff are still nearby. Troubleshooting in the street or in a moving taxi is far more stressful than fixing things beside the counter.
Next, confirm you have enough pesos in hand for your chosen transport. For a solo traveler heading to a central Manila hotel, a sensible minimum might be 1,000 pesos after buying your SIM. That amount typically covers a taxi or Grab ride, a quick meal, and some small purchases. If you plan to travel farther, such as to Quezon City or the Pasay bus terminals, increase that buffer accordingly and consider withdrawing one more time before you leave the building.
Open your preferred navigation app and save the location of your accommodation. Take a screenshot of the address, including the neighborhood and any helpful landmarks, in case your data connection drops or the driver is unfamiliar with the exact street. Many Manila addresses are imprecise, and drivers often rely on local landmarks like malls or major intersections. Showing a map pin or a screenshot speeds up the process and reduces the risk of misunderstandings over language or pronunciation.
Finally, if you are feeling overwhelmed after a long-haul flight, remember that you do not need to rush. NAIA’s arrivals areas include coffee shops, small restaurants, and seating where you can rest for a bit, recharge your phone, and watch how other passengers handle taxis and ride-hailing. Taking ten extra minutes inside the airport to prepare often leads to a calmer, safer, and cheaper journey into Manila.
FAQ
Q1. Can I buy a SIM card at every NAIA terminal?
Yes. Globe and Smart have a presence in all main NAIA terminals, but Terminal 3 usually has the most extensive choice and longest operating hours for SIM and tourist packages.
Q2. Are SIM cards at Manila airport more expensive than in the city?
Generally yes. Airport tourist bundles are convenient but often cost significantly more than comparable prepaid promos sold in Manila malls, telco stores, or convenience shops.
Q3. Is it better to use an eSIM or a physical SIM in the Philippines?
Both work. An eSIM is ideal if your phone supports it and you want to avoid swapping cards, while a physical SIM is simple and widely supported, especially in budget smartphones.
Q4. Are there ATMs after customs at NAIA?
Yes. In Terminal 3 and other terminals you will usually find multiple ATMs from major banks in the arrivals hall after customs, operating around the clock.
Q5. Should I exchange cash at the airport or wait for the city?
Exchange only what you need at the airport for immediate expenses. You will usually find better rates at reputable money changers in central Manila.
Q6. Can I pay for taxis from NAIA with a credit card?
Some ride-hailing services and a few premium taxis allow card payments, but most regular taxis expect cash in pesos, so withdraw or exchange money before leaving the terminal.
Q7. How much cash should I carry when leaving NAIA?
For a solo traveler, having around 1,000 to 2,000 pesos in small bills is usually enough for a taxi ride, a meal, and basic expenses on the first day.
Q8. Is Grab available at NAIA and is it safe?
Yes. Grab and similar apps operate at NAIA through a centralized hub. They are widely used by locals and visitors and are generally considered safe and reliable.
Q9. What should I do if my SIM does not work after buying it at the airport?
Do not leave the terminal yet. Return immediately to the kiosk, show the staff your phone’s settings, and ask them to confirm activation and network configuration.
Q10. Can I rely on airport Wi-Fi instead of buying a SIM?
Airport Wi-Fi is useful for quick tasks like messaging or booking a ride, but it is time-limited and sometimes unstable, so a local SIM or eSIM is much more reliable for ongoing use.